
No-Code AI Apps (Bubble + AI) full syllabus
Master the basics of Bubble workflows, UI design, and database setup for real-world applications.
Discover how to integrate ChatGPT, image generation, and automation APIs into your projects.
Understand AI-driven features like chatbots, recommendation engines, and smart dashboards.
Practice hands-on projects to launch your own AI-powered web apps quickly.
Explore techniques for scaling apps, optimizing performance, and user experience.
Get step-by-step guidance on deploying and monetizing no-code AI apps.
Perfect for beginners, startups, and professionals who want to build AI solutions fast.
MODULE 1: No-Code & AI App Basics
The rise of No-Code platforms has completely changed the way applications are built. You no longer need to be a professional programmer to launch a web app or even an AI-powered tool. With platforms like Bubble, and AI services like OpenAI, Zapier, and Make, anyone can bring their ideas to life faster than ever. Let’s dive deep into the basics.
What is a No-Code Platform?
A no-code platform is a development environment that allows you to build apps visually, without writing lines of code. Instead of typing complex programming scripts, you use drag-and-drop elements, workflows, and pre-built plugins.
- Accessibility: No-code empowers entrepreneurs, students, freelancers, and startups who don’t have technical expertise.
- Speed: You can create an MVP (Minimum Viable Product) in days instead of months.
- Cost-Effective: Hiring developers can be expensive, but with no-code, you can cut down costs drastically.
In short, no-code platforms bridge the gap between ideas and execution, making app development as simple as designing a presentation.
Why Bubble is Perfect for AI Apps
Among all no-code tools, Bubble.io stands out as one of the most powerful. Here’s why it’s perfect for AI applications:
- Visual Programming Power: Bubble allows you to design complex logic using workflows, without coding.
- API Connector: This feature makes it easy to connect AI services like OpenAI, DALL·E, or Whisper directly into your app.
- Database Management: AI apps often require storing user queries, chat history, or generated content. Bubble’s built-in database is highly flexible.
- Scalability: Whether you’re testing an MVP or scaling to thousands of users, Bubble adapts.
- Community & Plugins: There’s a strong marketplace of AI-focused plugins and an active community that helps beginners grow quickly.
This makes Bubble a top choice for anyone who wants to combine no-code simplicity with AI power.
How AI Fits into No-Code Development
Adding AI to no-code platforms is like giving your app superpowers. Instead of just building static apps, you can create intelligent and dynamic solutions.
- Chatbots: Integrate GPT-4 to provide conversational experiences like customer support or personal tutors.
- Image Generators: Use DALL·E or Stability AI APIs to create unique images based on text prompts.
- Document Analyzers: Build apps that summarize PDFs, extract keywords, or answer questions from uploaded files.
- Voice-to-Text Tools: With Whisper API, users can record voice notes and instantly convert them into text.
- Automation: Combine Bubble with Make/Zapier to trigger AI actions automatically, like sending an email after analyzing customer feedback.
This integration means your apps don’t just look good—they also think smart.
Top Use-Cases of No-Code AI Apps
Here are some real-world scenarios where no-code + AI creates magic:
- Customer Support Chatbots – Replace expensive call centers with 24/7 AI-powered chatbots.
- AI Poster Generator – Marketing teams can create social media posters in seconds.
- Smart Resume Analyzer – Job seekers upload resumes, and AI suggests improvements.
- Voice Note Summarizer – Professionals convert long meeting recordings into concise summaries.
- Personalized Learning Apps – Tutors can build apps that adjust lessons based on a student’s level.
These examples show that AI + No-Code is not just theory—it’s practical and profitable.
Tools We’ll Use in This Course
To build these powerful apps, we’ll explore a combination of no-code builders and AI services:
- Bubble.io → Core app builder (design, workflows, database).
- OpenAI (ChatGPT, DALL·E, Whisper) → For text, image, and speech AI.
- Make (Integromat) → Automations and multi-step workflows.
- Zapier → Quick automation between apps.
- Bubble API Connector → Connect external AI models and APIs.
- Custom GPTs → Fine-tuned AI models for niche use-cases.
With these tools, you’ll learn how to transform your ideas into functional AI-driven apps—without writing a single line of code.
Module 2: Mastering the Bubble Editor (From Zero)
If you want to build powerful no-code apps with Bubble.io, the very first step is mastering the Bubble Editor. This is where your ideas take shape—where design meets logic, and where apps come alive without a single line of code. In this module, we’ll go step by step, starting from the basics, so even absolute beginners can feel confident.
Bubble Editor 101: Pages, Elements, Workflows, and Data
The Bubble Editor has four main building blocks:
- Pages – Think of pages as the screens of your app (home page, login page, dashboard, etc.). Each page can have its own design and functionality.
- Elements – These are the visual components: text boxes, buttons, input fields, images, and repeating groups. Drag and drop them to build your interface.
- Workflows – The “brains” of your app. Workflows tell Bubble what to do when a user clicks a button, submits a form, or loads a page.
- Data – Bubble apps run on databases. Every time a user signs up, posts content, or saves a note, that data is stored in Bubble’s backend.
Learning how these four connect is the foundation of Bubble development.
Setting Up a Project: Responsive Layout & Design Principles
When you start a new project in Bubble:
- Responsive Layouts: Today’s apps must look good on all devices—desktop, tablet, and mobile. Bubble’s responsive editor lets you control how elements resize and rearrange automatically.
- Design Principles: Keep it clean and user-friendly. Use consistent fonts, colors, and spacing. Bubble also supports custom styles so you can apply your brand identity.
- Tip: Start with a simple wireframe before adding fancy features. It helps you stay focused on usability.
A well-designed foundation ensures your app feels professional from day one.
Using Repeating Groups, Inputs, Popups, and Buttons
- Repeating Groups: These are lists or grids that display dynamic data—like a product list, chat messages, or task items. Perfect for apps that require scrolling feeds.
- Inputs: Allow users to enter text, numbers, or files. For example, a login form or a note-taking field.
- Popups: Great for signups, alerts, or quick actions without leaving the page.
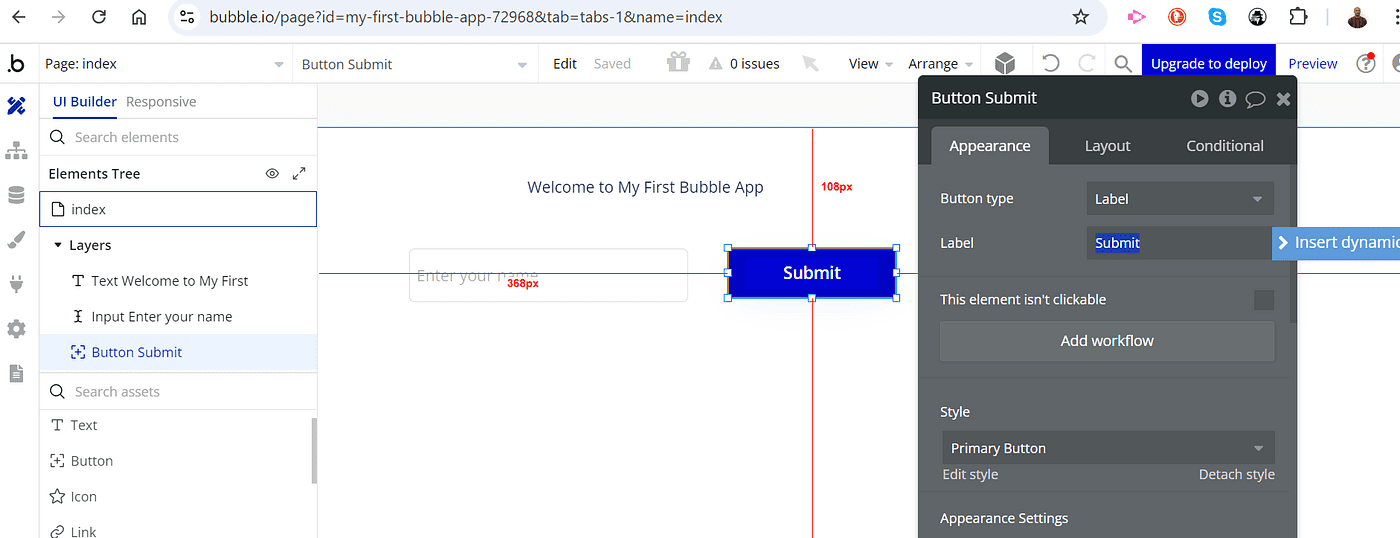
- Buttons: The most important triggers in your app. Every button is tied to a workflow—like “Sign Up,” “Add Task,” or “Generate with AI.”
Mastering these elements helps you build interactive and engaging user experiences.
Creating a Signup/Login System
Every app needs a way for users to create accounts and log in securely. Bubble makes this simple:
- Drag in input fields for Email and Password.
- Add a Sign Up button and connect it to a workflow.
- In the workflow, choose “Sign the user up” and connect the inputs.
- Similarly, for login, add a workflow with “Log the user in.”
- Protect private pages with Bubble’s privacy rules, so only logged-in users can access them.
Congratulations—you just built a secure authentication system without writing code.
Database Basics: Data Types, Fields, and Things
Understanding Bubble’s database is crucial:
- Data Types: These are like tables in Excel (e.g., “User,” “Task,” “Message”).
- Fields: Each data type has fields (like columns). Example: A Task might have fields like Title, Deadline, and Status.
- Things: Every time a user creates something (like a new task), Bubble saves it as a “Thing.”
Bubble’s database is powerful but beginner-friendly, making it easy to connect your UI with stored information.
Mini Project: Build a Simple To-Do App
Let’s bring everything together with a hands-on project.
Steps:
Style it for a clean, responsive look.
Create a new “Task” data type with fields: Title (text), Completed (yes/no).
On your page, add an input field for the task title.
Add a button “Add Task” → workflow: Create a new Task.
Insert a repeating group to display all tasks from the database.
Add a checkbox in the repeating group so users can mark tasks as completed.
Module 3: Bubble Workflows Deep Dive
If the Bubble Editor is the body of your no-code app, then Workflows are its brain. Workflows are what make your app interactive, dynamic, and intelligent. They tell Bubble exactly what should happen when a user clicks a button, loads a page, or meets a certain condition. In this module, we’ll take a deep dive into how workflows work, explore triggers, actions, conditional logic, and scheduled workflows—and finally build a Quiz App with scoring logic as a hands-on project.

Understanding Bubble Workflows
A workflow in Bubble is essentially a chain of events and actions. It follows a simple logic:
When [Trigger] happens → Do [Action(s)]
This structure allows you to design almost any type of app behavior without writing code.
Triggers: When Workflows Begin
A trigger is the starting point of a workflow. Bubble offers different types of triggers:
- When a Button is Clicked – The most common trigger. Example: When a user clicks “Submit Quiz”, a workflow starts to calculate their score.
- When a Page is Loaded – Useful for auto-start actions. Example: When a dashboard loads, fetch the user’s latest activity.
- When a Condition is True – Dynamic triggers that run only if certain criteria are met. Example: If the user’s score > 80, show a “Congratulations” popup.
Triggers allow you to decide when your app should respond to users or data changes.
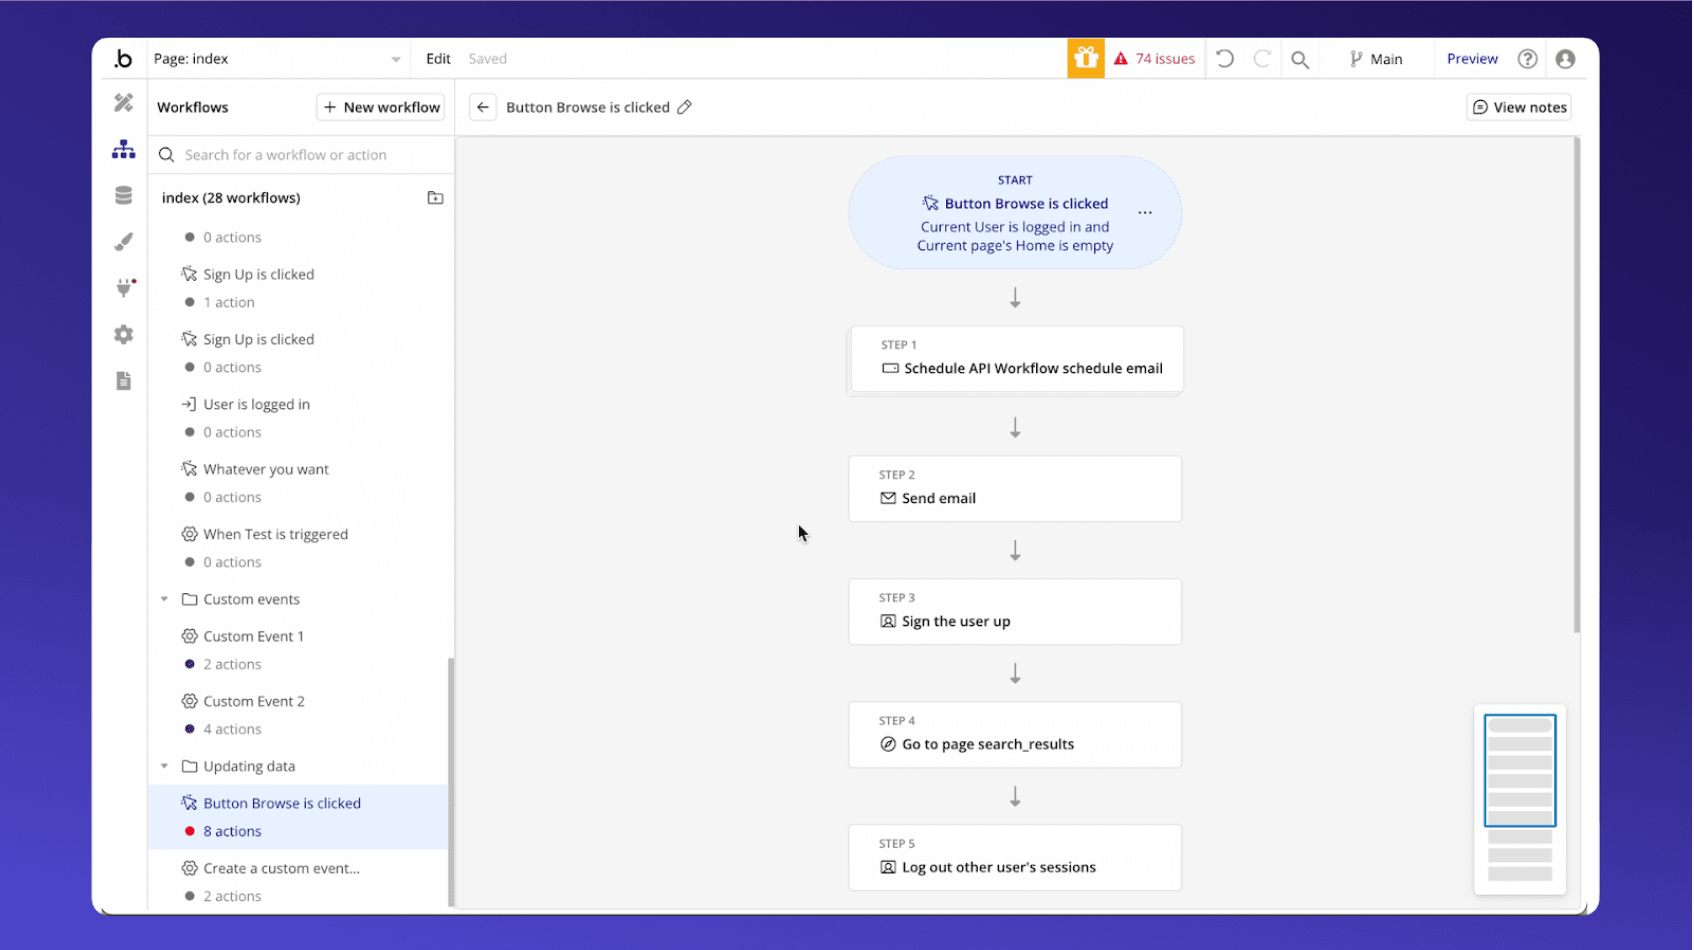
Actions: What Workflows Do
Once a workflow is triggered, actions define what happens next. Some of the most common workflow actions in Bubble are:
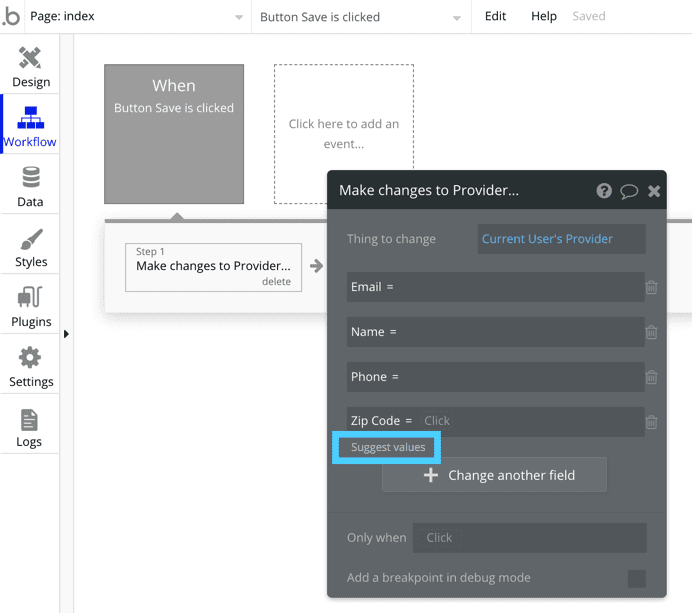
- Show/Hide Elements – Control visibility of popups, buttons, or forms.
- Make Changes to a Thing – Update data in the database (e.g., change a task status from “pending” to “done”).
- Navigate to a Page – Redirect users to another screen (e.g., from the login page to the dashboard).
- Send Emails / Alerts – Trigger communication with users.
Actions are flexible and can be combined to create complex logic with ease.
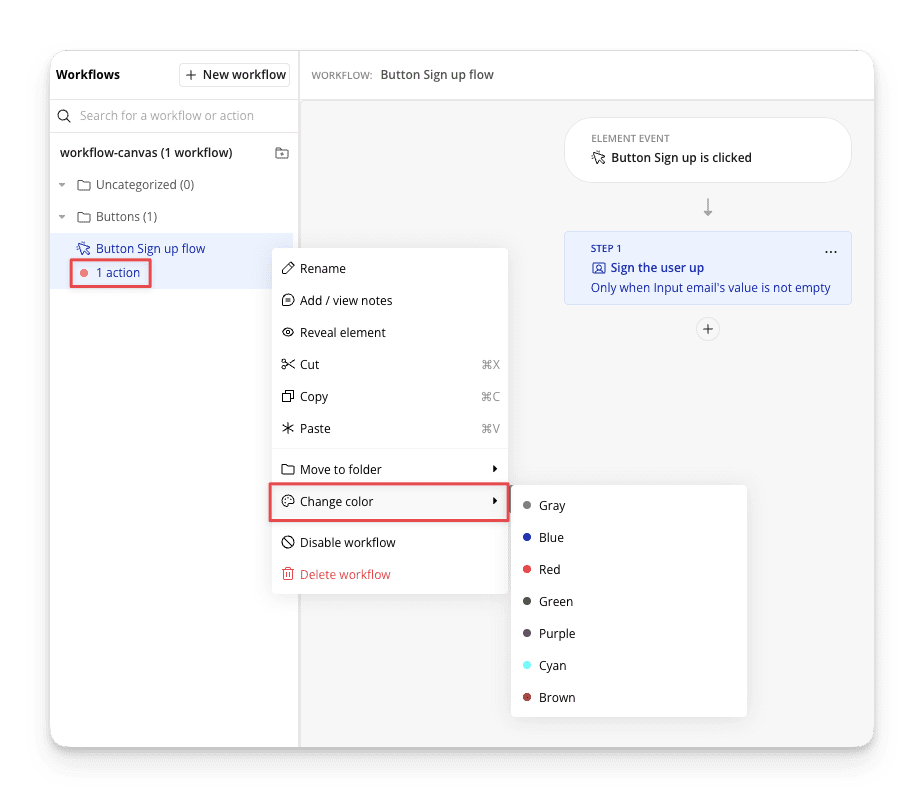
Custom States & Conditional Logic
Sometimes, you don’t need to store data in the database but still need temporary values while users interact with your app. That’s where custom states come in.
- Custom States: Temporary variables that exist only while the user is on the page. For example, you can set a custom state called “Current Score” to keep track of quiz answers before saving them.
- Conditional Logic: Workflows can also be wrapped in conditions. For instance:
- “Only when Current Score ≥ 5” → Show Success Popup.
- “Only when user is logged in” → Allow access to Dashboard.
This combination gives your app smart, real-time behavior without unnecessary database calls.
Scheduled Workflows (Backend Workflows)
Some actions don’t need to happen instantly—they can be scheduled for later. Bubble handles this with backend workflows (also called scheduled workflows).
- Examples:
- Send a reminder email 24 hours after a user signs up.
- Auto-delete temporary data after 7 days.
- Generate weekly reports every Monday.
Backend workflows make your apps more automated, efficient, and scalable.
Mini Project: Build a Quiz App with Scoring Logic
Let’s put everything together with a practical project.
Goal: Build a simple Quiz App where users answer questions, and their score is calculated automatically.
Steps:
- Database Setup
- Create a data type called Question with fields: Question Text, Option A, Option B, Option C, Correct Answer.
- Create a data type called Result with fields: User, Score.
- UI Setup
- Use a Repeating Group to display questions and options.
- Add radio buttons for answer selection.
- Add a Submit Quiz button.
- Workflow Logic
- Trigger: When Submit button is clicked.
- Actions:
- Check each answer against the correct answer.
- Increase the Score (using custom states to track).
- Save the final score to the database.
- Conditional Logic
- If Score ≥ 80 → Show “Congratulations, You Passed!” popup.
- Else → Show “Try Again” message.
- Bonus: Backend Workflow
- Schedule an email with the quiz results to be sent 5 minutes after submission.
With this project, you’ll master triggers, actions, conditions, custom states, and even scheduled workflows—all in one go.
MODULE 4: Connecting AI to Bubble (API Integration)
The real magic of no-code AI apps with Bubble begins when you connect your Bubble project to powerful AI models through APIs. APIs (Application Programming Interfaces) are like digital bridges—they allow your Bubble app to “talk” to external AI services such as ChatGPT, Stability AI, Whisper, Hugging Face, and Google AI. With this connection, your no-code app transforms from a static tool into a dynamic, intelligent platform that can generate text, create images, analyze data, and even understand speech

What is an API & How Bubble Connects with AI
An API is a messenger that carries a request from your app to a service, and then brings back the response.
- Example: Your Bubble app sends a question to ChatGPT via an API → ChatGPT processes it → the response comes back and displays instantly inside your app.
Bubble makes this process easy through its API Connector Plugin—a built-in tool that lets you integrate any AI service without writing complex backend cod
Setting up Bubble’s API Connector
- Go to the Plugins tab in Bubble.
- Search and install API Connector.
- Create a new API integration by entering details like:
- API name
- Authentication key (from AI service)
- Endpoint URL (provided by the AI platform)
- Test the API call and map the returned data into your Bubble workf Once connected, you can use AI responses just like any other Bubble data type.
Connecting Bubble with Popular AI APIs
1. OpenAI (ChatGPT & Generative AI)
- Use cases: Chatbots, automated content writing, summarization, idea generation.
- Example: Create a “ChatGPT inside Bubble” feature where users type a question and instantly get an AI-powered answer on screen.
2. Stability AI or Replicate (Image Generation)
- Use cases: AI-powered image generators, custom avatars, creative design tools.
- Example: Build an AI art app where users type “A futuristic city at sunset” → Stability AI generates the image → Bubble displays it instantly.
3. Whisper API (Speech-to-Text)
- Use cases: Voice notes to text, subtitles for videos, transcription services.
- Example: Add a “Record Audio” button to your Bubble app. The audio gets sent to Whisper API, which returns accurate text transcription in seconds.
4. Google AI (Vision & NLP)
- Use cases: Image recognition, sentiment analysis, natural language understanding.
- Example: Upload an image in your Bubble app → Google Vision API identifies objects (e.g., “cat, sofa, laptop”) → data can be stored or displayed.
5. Hugging Face Models
- Use cases: Custom NLP tasks like translation, text classification, summarization, or even running custom ML models.
- Example: Build a language translation app inside Bubble by connecting Hugging Face’s translation models via API.
Learn by Doing: Call ChatGPT inside Bubble
Let’s create a mini-project to put theory into practice.
- Step 1: Install the API Connector and link it with OpenAI’s API key.
- Step 2: Add a text input box for users to type their query.
- Step 3: Create a workflow that sends the query to ChatGPT API when the user clicks “Ask AI.”
- Step 4: Display ChatGPT’s response in a repeating group or text box.
End result: A fully functional AI Q&A chatbot built without writing code, powered by Bubble + OpenAI.
MODULE 5:Building AI Chat & Image Generator in Bubble
No-code platforms like Bubble have made it incredibly easy to integrate advanced AI features without writing complex code. In this module, we’ll explore how to build a ChatGPT-powered chatbot and an AI image generator inside Bubble – all in a single, seamless workflow. Think of it as creating your own “AI Support + AI Poster Generator” application with a WhatsApp-like experience.
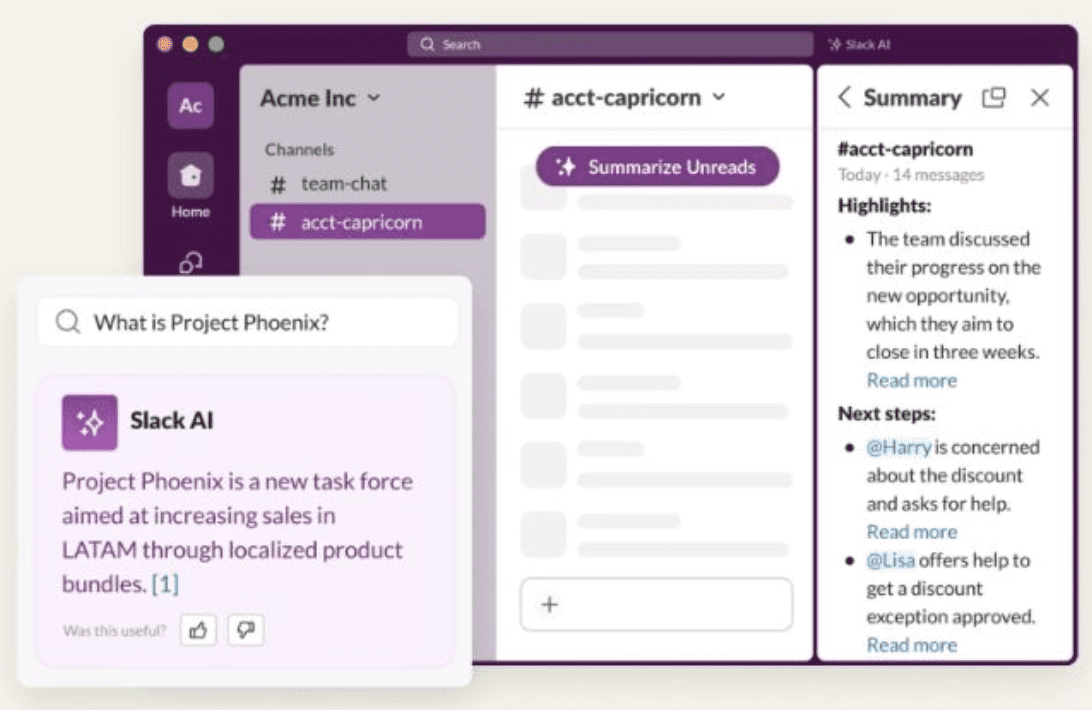
1. Why Combine Chatbot & Image Generation?
Most businesses today want more than just text-based interactions. Customers expect:
- Instant answers through AI chat (like ChatGPT).
- Creative outputs such as posters, banners, or AI-generated visuals.
By combining these features in Bubble, you can build a multi-purpose AI assistant that not only chats like a human but also creates images on demand.
2. Building the Chatbot in Bubble
First, we focus on creating the chat experience.
Steps:
- Chat UI Setup
- Use Bubble’s repeating groups to display messages.
- Style the design with rounded message bubbles for a WhatsApp-like feel.
- Add timestamps and user avatars for realism.
- OpenAI GPT-4 API Integration
- Connect GPT-4 through the Bubble API Connector.
- Send user messages as input and return AI responses.
- Handle conversation context by storing previous chats in the database.
- Chat History Storage
- Create a Bubble database table for messages.
- Store
User Message,AI Response, andTimestamp. - Allow users to revisit previous conversations.
- Enhancing the Experience
- Add typing indicators (“AI is thinking…”).
- Enable quick reply buttons for FAQs.
- Keep the design mobile-friendly for a modern feel.
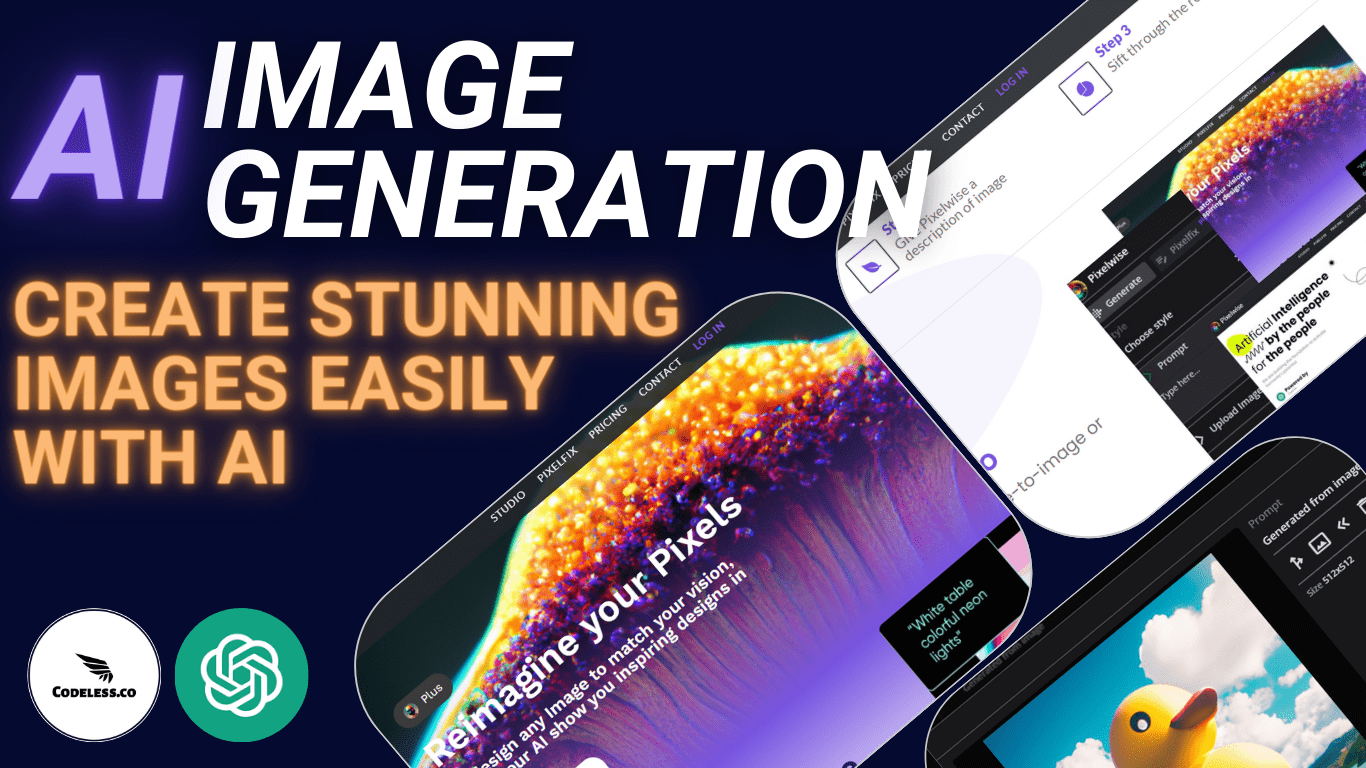
3. Adding AI Image Generation
Next, let’s bring in the visual magic with AI image APIs.
Steps:
- Connect Image API
- Use DALL·E or Stability AI with Bubble’s API Connector.
- Pass the user’s prompt (e.g., “Create a poster for a music festival”).
- Display & Store Images
- Show generated images in a gallery layout.
- Save them in the Bubble database for future access.
- Allow users to download or share images directly.
- Polished User Experience
- Add a loading animation while the AI creates images.
- Give users multiple variations of the same prompt.
- Provide an “Edit & Regenerate” button for fine-tuning.
4. Final Project: AI Chat + Poster Generator App
Here’s what your combined project will look like:
Chat Section: Users can chat with an AI-powered support bot, just like WhatsApp.
Image Generator Section: Users can enter prompts and instantly generate posters, designs, or creative images.
Database: Stores both chat history and generated images.
Modern Design: Smooth, mobile-first layout with a professional look.
5. Use Cases of This Module
- Customer Support: An AI bot that answers FAQs and generates product mockups.
- Marketing Teams: Chat + instantly create social media posters.
- Creative Tools: Allow users to brainstorm ideas via chat, then visualize them as images.
- E-commerce: Virtual assistant + AI product banner generator.
6. SEO-Oriented Benefits
By implementing this module, you’re building a no-code AI-powered app in Bubble that:
- Boosts engagement with real-time conversations.
- Attracts traffic by offering AI-generated visuals.
- Stands out as a complete AI solution instead of just a chatbot.
Module 7: Voice & Audio Features (Speech AI)

Why Voice AI in Bubble?
Voice is becoming a natural interface for productivity apps, customer service tools, and accessibility-friendly products. Integrating speech AI in Bubble enables users to interact hands-free, record notes, or even listen to text outputs.
Steps to Build:
- Audio Recording in Bubble
- Install a Bubble audio recorder plugin that lets users record voice directly in the browser.
- Store recordings temporarily in Bubble’s database or upload to cloud storage.
- Speech-to-Text with Whisper API
- Send recorded audio to OpenAI’s Whisper API, which transcribes speech into text.
- Display transcription instantly in Bubble’s text field or chat-style interface.
- Optional: Text-to-Speech (TTS) with ElevenLabs
- Integrate ElevenLabs API to convert any text (e.g., AI summary, bot reply) back into natural voice.
- Add a “Listen” button under text results for accessibility.
Mini Project: Voice Note to Text Summary
Imagine a productivity app where users record a quick voice note → Whisper transcribes it → GPT-4 summarizes → ElevenLabs plays back a concise audio version. Great for busy professionals or students!
Module 8: Document AI Apps
Why Document AI?
From resumes to research papers, users need fast insights from lengthy files. Bubble, paired with AI, can extract, summarize, and analyze documents—no manual reading required.
Steps to Build:
- Upload PDFs or Docs in Bubble
- Use Bubble’s File Uploader element.
- Store files securely in the Bubble database or external storage.
- Extract Text from Documents
- Use a PDF/Doc parser plugin to pull out raw text.
- Alternatively, send files to an external API for structured extraction.
- AI Processing (Summarization, Q&A, Keyword Extraction)
- Send extracted text to GPT-4 or other OpenAI models.
- Create workflows for different tasks:
- Summarization → get concise notes.
- Q&A → user asks questions, AI answers from document content.
- Keyword extraction → useful for SEO, tagging, or resume analysis.
- Display Results in Bubble
- Show clean summaries in text blocks.
- Use repeating groups for extracted keywords or Q&A outputs.
Mini Projects:
- AI PDF Reader: Upload any PDF and get instant AI-generated summary & insights.
- Smart Resume Analyzer: Upload resumes, extract candidate highlights, skills, and auto-match them to job descriptions.
Module 9: Automation with Make & Zapier
Why Automation?
Automation turns your Bubble app into a business-ready system by connecting with tools like Gmail, Google Sheets, and Notion. Instead of manually exporting/importing data, let Make or Zapier handle repetitive tasks.
Steps to Build:
- Basics of Automation Tools
- Make (Integromat): Best for complex multi-step workflows (file handling, branching logic).
- Zapier: Great for quick automation with popular apps (Gmail, Slack, Google Sheets).
- Connect Bubble to External Tools
- Use Bubble’s API Connector or dedicated plugins to send/receive data.
- Example: When a form is submitted in Bubble, send details to Google Sheets via Make.
- Email Triggers & File Handling
- Automatically send emails when new files (e.g., resumes, PDFs) are uploaded.
- Generate summaries using GPT-4 and send results to Gmail.
- Multi-Tool Workflows
- Example: A user uploads a resume → Bubble stores it → AI analyzes skills → Make posts summary into Notion database → Zapier sends confirmation email.
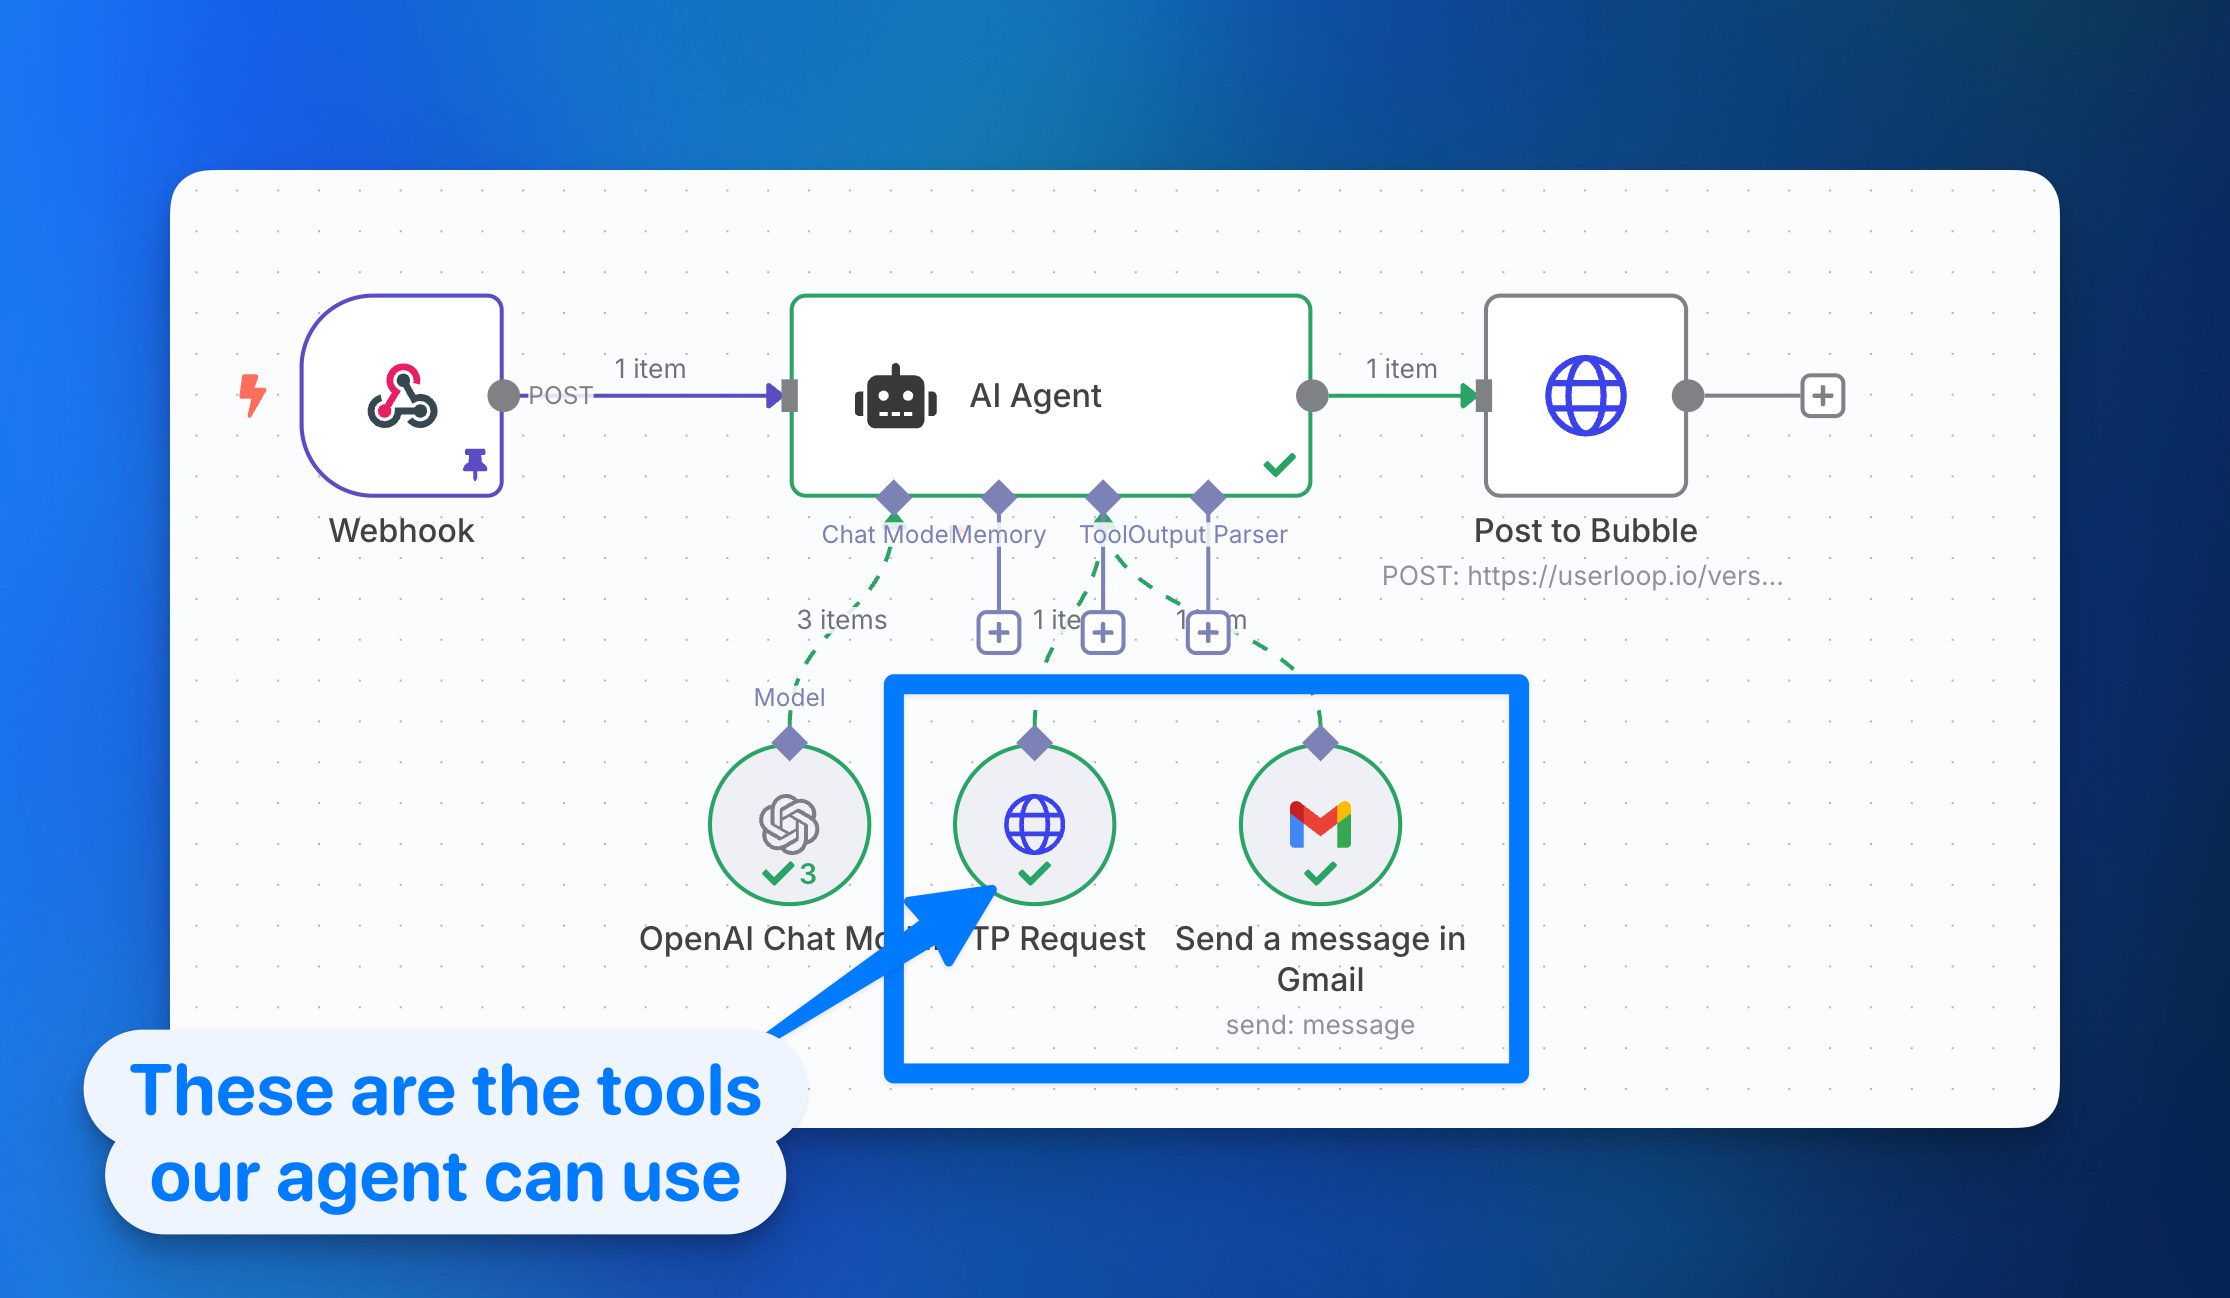
Mini Project: Auto-Generate Emails with Bubble + AI + Gmail
- User enters prompt or upload file → GPT-4 generates professional email → Automation sends it via Gmail automatically.
Combined Project Ideas
Now let’s see how these three modules blend together into powerful real-world apps:
Automation sends escalations or summaries to support team inbox.
AI Career Coach App
Voice input → Whisper transcribes → GPT-4 generates tailored career advice → Email summary sent via Zapier.
AI Meeting Assistant
Upload meeting transcript or voice recording → Summarize + extract action items → Auto-sync with Notion or Google Sheets via Make.
AI Customer Support Dashboard
Users upload documents (manuals, FAQs) → AI provides instant Q&A.
Voice option for accessibility.
MODULE 10:Monetization, Deployment, and Scaling Your No-Code AI SaaS on Bubble
Building an AI-powered app in Bubble is only half the journey. The real success comes when you monetize, launch, and scale your no-code product into a revenue-generating SaaS business. This combined module walks you through everything — from setting up Stripe payments to deploying your app on a custom domain and preparing it for growth.
Step 1: Setting Up Pricing Plans & Monetization No-Code AI Apps
Every SaaS needs a clear pricing strategy. Bubble allows you to create usage-based plans without complex coding.
- Free Plan: Limited access to basic features (great for user acquisition).
- Pro Plan: Unlock advanced AI tools with higher limits.
- Premium Plan: Enterprise-level users with unlimited credits, priority support, and white-label features.
Best Practice: Create a feature comparison table inside your Bubble app so users clearly see what’s included in each plan.
Step 2: Stripe Integration (No-Code Setup)
Stripe is the backbone of modern SaaS payments. Bubble makes it easy to connect Stripe using plugins:
- Install the Stripe plugin from the Bubble marketplace.
- Set up one-time payments or recurring subscriptions.
- Configure webhooks to track events like failed payments, cancellations, or plan upgrades.
Pro Tip: Offer a free trial before subscription — it increases conversions by letting users experience your AI tool risk-free.
Step 3: Managing Users & Roles
A SaaS app often has different user roles:
- Admin: Full access to manage users, billing, and app settings.
- User: Regular customers with plan-based restrictions.
- Guest: Non-logged-in visitors with limited previews.
Bubble’s built-in privacy rules let you define who can see what data — ensuring data security and GDPR complianceep 4: Data Security Best Practic
When dealing with AI apps that might handle sensitive data, trust is critical.
- Use Bubble Privacy Rules to restrict access to sensitive fields.
- Encrypt payment and personal data.
- Regularly audit your app for vulnerabilities.
- Add CAPTCHA & 2FA for login security.
🚀 Step 5: Testing & Debugging Your App No-Code AI Apps
Before going live, your Bubble app needs to be thoroughly tested.
- Use Bubble’s built-in debugger to catch logic issues.
- Test payment flows with Stripe test mode.
- Run cross-device checks for responsiveness.
💡 Pro Tip: Create a “Staging” version of your app to test new features without affecting live users.
🌍 Step 6: Custom Domain & Branding
Your SaaS should live on a professional domain.
- Connect your app to a custom domain via Bubble’s settings.
- Add an SSL certificate (Bubble provides free SSL).
- Ensure your domain aligns with your brand identity (e.g.,
myaiapp.com).
📱 Step 7: Responsive Optimization
Over 70% of SaaS users access apps on mobile devices. In Bubble:
- Use the responsive editor to adjust layouts for mobile & tablet.
- Test forms, dashboards, and payment pages across screen sizes.
- Keep navigation simple and clutter-free.
⚡ Step 8: Performance Optimization
Speed is revenue. A slow SaaS app leads to higher churn.
- Minimize image sizes & use lazy loading.
- Use Bubble’s “optimize application” options.
- Offload heavy processes (like AI calls) to background workflows.
📊 Step 9: Adding Analytics & Tracking
To scale, you need to understand user behavior.
- Add Google Analytics or Mixpanel to track engagement.
- Track churn rates, subscription upgrades, and active users.
- Use data to refine pricing, features, and user experience.
📈 Step 10: Scaling Your No-Code AI SaaS
Once your app is monetized and deployed, focus on growth strategies:
- Invest in performance marketing (Google Ads, Meta Ads) to acquire users.
- Add referral programs to encourage organic growth.
- Use automation tools like Make & Zapier (from Module 9) to streamline operations.
- Offer API access for enterprise users who want deeper integration.